1. 概要
今回は画面をキャプチャして画像として保存する内容となります。
対象としては開発を1年程やってて自分で最初から開発してみたい方になります。そのため細かい用語などの説明はしません。
2. プロジェクトの準備
2-1. プロジェクトを作成
3. Dependenciesの追加
3-1. path_providerを追加
flutter pub add path_provider4. ソースコード
4-1. main.dart
import 'package:flutter/material.dart';

import 'home.dart';

void main() {
  runApp(const MyApp());
}

class MyApp extends StatelessWidget {
  const MyApp({super.key});

  @override
  Widget build(BuildContext context) {
    return MaterialApp(
      title: 'Flutter Demo',
      theme: ThemeData(
        primarySwatch: Colors.blue,
      ),
      home: const MyHomePage(title: 'Image from widget'),
    );
  }
}
4-2. home.dart
import 'dart:io';
import 'package:flutter/foundation.dart';
import 'package:flutter/material.dart';
import 'package:flutter/rendering.dart';
import 'dart:ui' as ui;
import 'package:path_provider/path_provider.dart';

class MyHomePage extends StatefulWidget {
  const MyHomePage({super.key, required this.title});

  final String title;

  @override
  State<MyHomePage> createState() => _MyHomePageState();
}

class _MyHomePageState extends State<MyHomePage> {
  final GlobalKey _globalKey = GlobalKey();

  @override
  void initState() {
    super.initState();
  }

  List<int> list = <int>[1, 2, 3];

  void _incrementCounter() {
    setState(() {
      list.add(list.length + 1);
    });
  }

  @override
  Widget build(BuildContext context) {
    return Scaffold(
      appBar: AppBar(
        title: Text(widget.title),
      ),
      body: Scrollbar(
        thickness: 20.0,
        trackVisibility: true,
        child: Container(
          color: Colors.black,
          child: Column(
            children: [
              Flexible(
                child: RepaintBoundary(
                  key: _globalKey,
                  child: ListView.builder(
                      itemCount: list.length,
                      itemBuilder: (context, index) => ListTile(
                            title: Center(
                                child: Text(
                              list[index].toString(),
                              style: const TextStyle(
                                  fontSize: 30.0, color: Colors.white),
                            )),
                          )),
                ),
              ),
              ElevatedButton(
                  onPressed: () => _captureImage(), child: const Text('Take')),
            ],
          ),
        ),
      ),
      floatingActionButton: FloatingActionButton(
        onPressed: _incrementCounter,
        tooltip: 'Increment',
        child: const Icon(Icons.add),
      ),
    );
  }

  Future<void> _captureImage() async {
    final RenderRepaintBoundary boundary =
        _globalKey.currentContext!.findRenderObject()! as RenderRepaintBoundary;
    final ui.Image image = await boundary.toImage();
    final ByteData? byteData =
        await image.toByteData(format: ui.ImageByteFormat.png);
    final Uint8List pngBytes = byteData!.buffer.asUint8List();
    final Directory appDir = await getApplicationDocumentsDirectory();
    final String appDirPath = appDir.path;
    // print('appDirPath=$appDirPath');
    final File imageFile = await File('$appDirPath/image.png').create();
    await imageFile.writeAsBytes(pngBytes);
  }
}
5. 結果
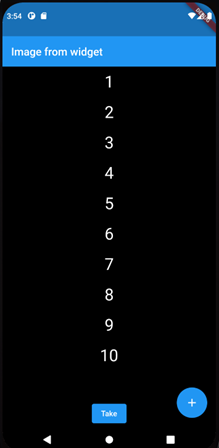
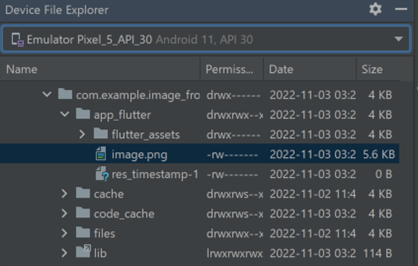
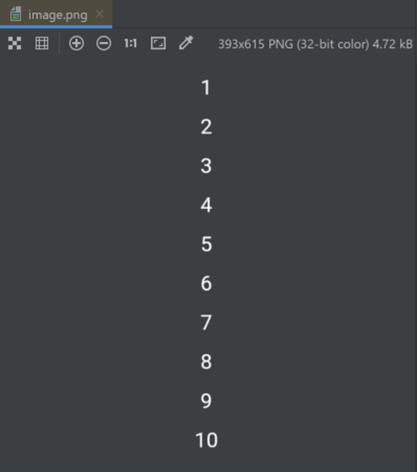
6. 備考
Platform毎に制約があるようなのでこちらを参考にした方が良さそうですね。
- path_provider | Flutter Package (pub.dev)
- Supported platforms and paths
- Directories support by platform:
- Supported platforms and paths
7. 参考
- toImage method – RenderRepaintBoundary class – rendering library – Dart API (flutter.dev)
- path_provider | Flutter Package (pub.dev)
- Read and write files | Flutter
投稿者プロフィール
-
開発好きなシステムエンジニアです。
卓球にハマってます。


