- 【#2 Expanded】動画
- 【#2 Expanded】概要
- 【#2 Expanded】解説
- 【#2 Expanded】サンプルコード①(Rowの場合)
- 【#2 Expanded】サンプルコード②(Columnの場合)
【#2 Expanded】動画
【#2 Expanded】概要
①ほぼ全てのFlutterのレイアウトにはRow(行)とColumn(列)が存在するらしい!
②まずはRow / Columnウィジェットの使い方を簡単に解説するよー
③Row / Columnウィジェット単体では子ウィジェットの幅や高さを個別に設定することはできないんだってさ
③子ウィジェットの幅や高さを個別に変えたい時に活躍するのがExpandedウィジェット!
【#2 Expanded】解説
①ほぼ全てのFlutterのレイアウトにはRow(行)とColumn(列)が存在するらしい!
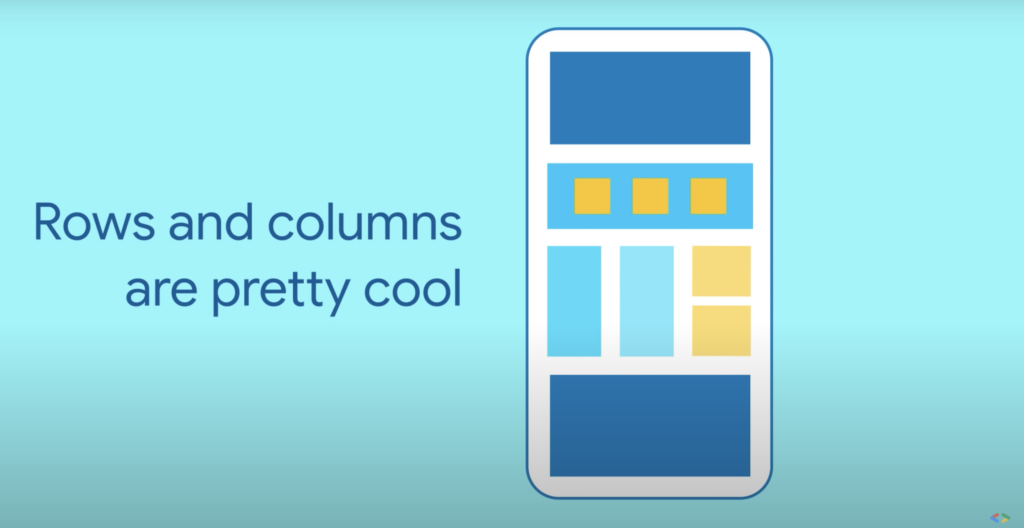
Flutterでは複数のウィジェットを横に並べて表示したい時はRowウィジェット、縦に並べて表示したい時はColumnウィジェットを使用します。
ちょっとしたアプリ作るにしてもレイアウトを考えたりしますよね。
Flutterではそのレイアウトを調整するのに必ずといっていいほどRowとColumnが関わってきます。
そのRowとかColumnとか一体どう使うんですか?という方のために次の項目で解説をしていきますね。
②まずはRow / Columnウィジェットの使い方を簡単に解説するよー
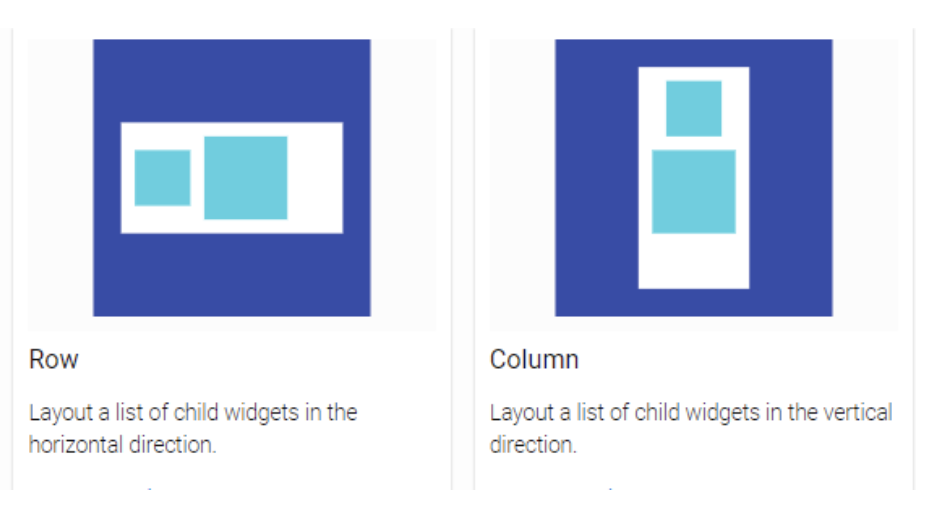
Row
主なプロパティ
①children
型: List
一番大事。横に並べたいウィジェットをリストにして設定する。
②mainAxisAlignment
型: MainAxisAlignment
子ウィジェットの配置を設定できる。MainAxisAlignmentはenum型になっていてcenterやspaceEvenlyなどがある。
③crossAxisAlignment
型: CrossAxisAlignment
Rowの親ウィジェットを基準にして子ウィジェットの縦の位置を設定できる。CrossAxisAlignmentもenum型でstartやendなどがある。
※詳細はこちら(公式ドキュメント
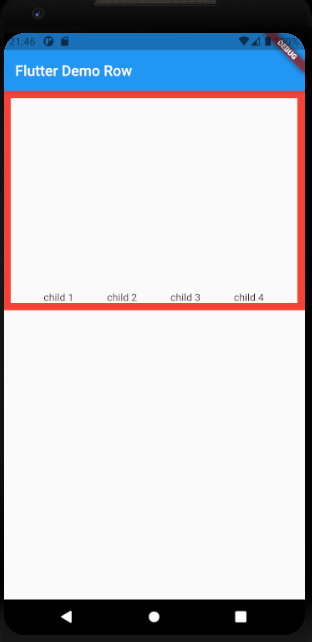
サンプルコード
Container(
        height: 300,
        decoration: BoxDecoration(border: Border.all(color: Colors.red, width: 10.0)),
        child: Row(
          // 子ウィジェットを等間隔で並べる
          mainAxisAlignment: MainAxisAlignment.spaceEvenly,
          // Rowの親であるContainerを基準としてその最下部に表示する
          crossAxisAlignment: CrossAxisAlignment.end,
          // 横に並べて表示したいウィジェットをリストにして設定する
          children: <Widget>[
            Text('child 1'),
            Text('child 2'),
            Text('child 3'),
            Text('child 4'),
          ],
        ),
      )
Column
主なプロパティ
①children
型: List
一番大事。Rowとは逆で縦に並べたいウィジェットをリストにして設定する。
②mainAxisAlignment
型: MainAxisAlignment
子ウィジェットの配置を設定できる。MainAxisAlignmentはenum型になっていてcenterやspaceEvenlyなどがある。
③crossAxisAlignment
型: CrossAxisAlignment
Columnの親ウィジェットを基準にして子ウィジェットの横の位置を設定できる。CrossAxisAlignmentもenum型でstartやendなどがある。
※詳細はこちら(公式ドキュメント)
サンプルコード
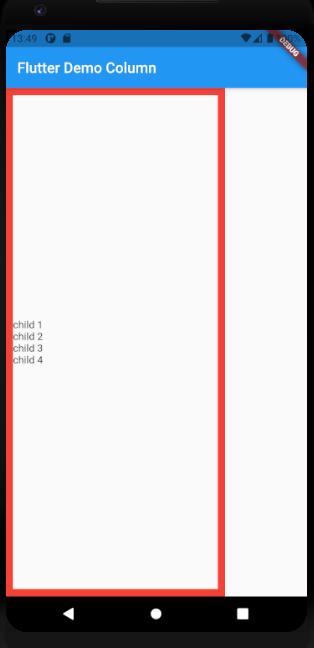
Container(
        width: 300,
        decoration: BoxDecoration(border: Border.all(color: Colors.red, width: 10.0)),
        child: Column(
          // 子ウィジェットを中心に並べる
          mainAxisAlignment: MainAxisAlignment.center,
          // Columnの親であるContainerを基準として一番左に表示する
          crossAxisAlignment: CrossAxisAlignment.start,
          // 縦に並べて表示したいウィジェットをリストにして設定する
          children: <Widget>[
            Text('child 1'),
            Text('child 2'),
            Text('child 3'),
            Text('child 4'),
          ],
        ),
      ),
③Row / Columnウィジェット単体では子ウィジェットの幅や高さを
個別に設定することはできないんだってさ
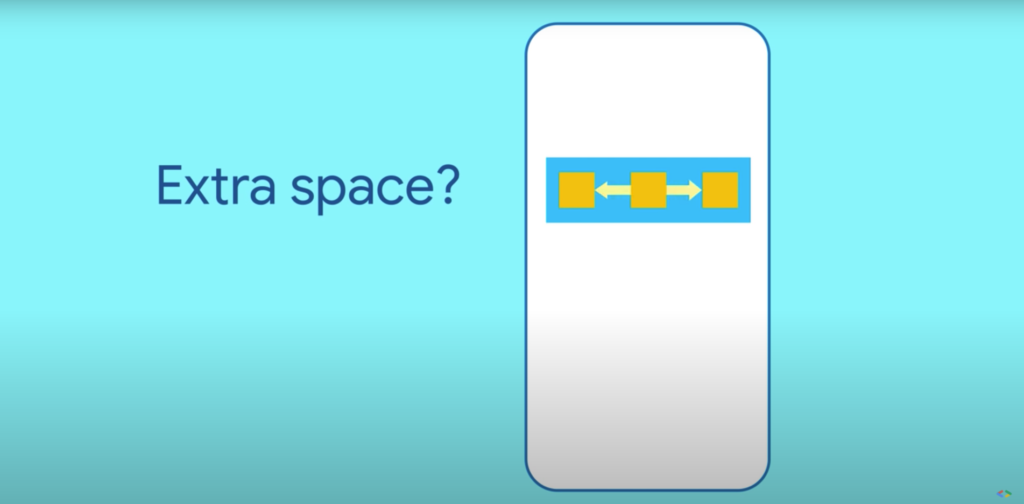
Row / Columnの解説で出てきたmainAxisAlignmentやcrossAxisAlignmentを使うことで子ウィジェット全体の配置変更の方法はお伝えできたかと思います。
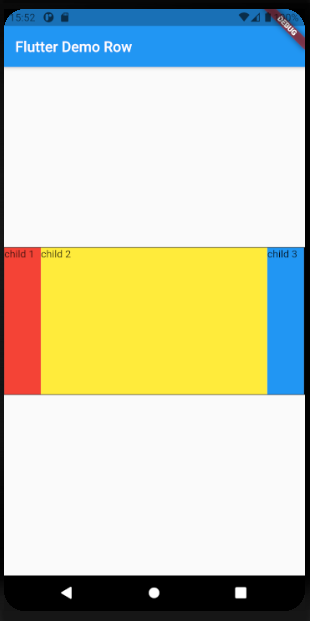
ただ、上記画像のように真ん中の子ウィジェットだけの幅を広げたい時はどうしたらいいのでしょう?
残念ながらRow / Columnには個別に子ウィジェットの幅や高さを設定するというような細やかな機能は備わっていません。
そこで活躍するのがExpandedウィジェットです!
④子ウィジェットの幅や高さを個別に変えたい時に活躍するのがExpandedウィジェット
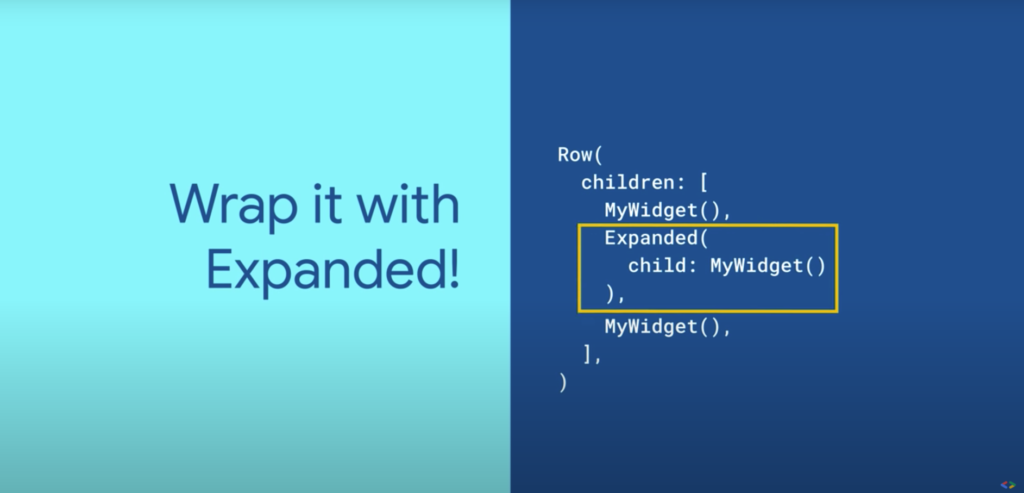
主なプロパティ
①child
型: Widget
ラップしたいウィジェットを設定する。②flex
型:int
子ウィジェットを表示する幅や高さの比率を設定できる。※詳細はこちら(公式ドキュメント)
【#2 Expanded】サンプルコード① (Rowの場合)
import 'package:flutter/material.dart';

void main() {
  runApp(MyApp());
}

class MyApp extends StatelessWidget {
  // This widget is the root of your application.
  @override
  Widget build(BuildContext context) {
    return MaterialApp(
      title: 'Flutter Demo',
      theme: ThemeData(
        primarySwatch: Colors.blue,
      ),
      home: MyHomePage(title: 'Flutter Demo Row'),
    );
  }
}

class MyHomePage extends StatefulWidget {
  MyHomePage({Key key, this.title}) : super(key: key);

  final String title;

  @override
  _MyHomePageState createState() => _MyHomePageState();
}

class _MyHomePageState extends State<MyHomePage> {
  @override
  Widget build(BuildContext context) {
    return Scaffold(
      appBar: AppBar(title: Text(widget.title)),
      body: Center(
        child: Container(
          decoration: BoxDecoration(border: Border.all(color: Colors.black)),
          child: Row(
            crossAxisAlignment: CrossAxisAlignment.center,
            children: <Widget>[
              Container(
                height: 200,
                width: 50,
                color: Colors.red,
                child: Text('child 1'),
              ),
              // 真ん中のContainerだけをExpandedでラップ
              // 他二つのContainerを除いたRowの余白いっぱいに広がる
              Expanded(
                child: Container(
                  height: 200,
                  color: Colors.yellow,
                  child: Text('child 2'),
                ),
              ),
              Container(
                height: 200,
                width: 50,
                color: Colors.blue,
                child: Text('child 3'),
              ),
            ],
          ),
        ),
      ),
    );
  }
}
【#2 Expanded】サンプルコード②(Columnの場合)

import 'package:flutter/material.dart';

void main() {
  runApp(MyApp());
}

class MyApp extends StatelessWidget {
  // This widget is the root of your application.
  @override
  Widget build(BuildContext context) {
    return MaterialApp(
      title: 'Flutter Demo',
      theme: ThemeData(
        primarySwatch: Colors.blue,
      ),
      home: MyHomePage(title: 'Flutter Demo Column'),
    );
  }
}

class MyHomePage extends StatefulWidget {
  MyHomePage({Key key, this.title}) : super(key: key);

  final String title;

  @override
  _MyHomePageState createState() => _MyHomePageState();
}

class _MyHomePageState extends State<MyHomePage> {
  @override
  Widget build(BuildContext context) {
    return Scaffold(
      appBar: AppBar(title: Text(widget.title)),
      body: Center(
        child: Container(
          decoration: BoxDecoration(border: Border.all(color: Colors.black)),
          child: Column(
            crossAxisAlignment: CrossAxisAlignment.center,
            children: <Widget>[
              // ContainerをExpandedでラップ
              // 各子ウィジェットの表示する高さの比率は1:2:3
              Expanded(
                flex: 1,
                child: Container(
                  width: 200,
                  color: Colors.red,
                  child: Text('child 1'),
                ),
              ),
              Expanded(
                flex: 2,
                child: Container(
                  width: 200,
                  color: Colors.yellow,
                  child: Text('child 2'),
                ),
              ),
              Expanded(
                flex: 3,
                child: Container(
                  width: 200,
                  color: Colors.blue,
                  child: Text('child 3'),
                ),
              ),
            ],
          ),
        ),
      ),
    );
  }
}
投稿者プロフィール
-
社会人歴2年目の駆け出しエンジニアです。
学生の時はがっつり文系(=遊んだただけ)でほぼPCに触れずに生きてきたので、プログラミングは日々勉強中。Vue / React / Django / Springなど色々浮気して今はFlutterにハマってます。
趣味は海外旅行、釣り、卓球など。
Twitterでも色々発信してるので良ければフォローお願いします。