目次
始めに
前回までJavaのサーバー側の開発をしていましたが、そもそもなんでOpenAPIで開発してたんだっけ?という原点に立ち返ってみますと、フロント・バックエンドが同じ定義を使用して、それぞれ独立して開発するためでした。
ということで今回はクライアント側のコードの定義にそって自動生成をしてみたいと思います。
今回の要約
- OpenAPI定義yamlからopenapi-generatorを使用してFlutterのクライアントコードを自動生成します。この時、自動生成の -g オプションに dart を設定するので、httpパッケージを使用したコードになります。
- 動作確認ではprismを使用して、生成に使用したOpenAPI定義yamlからMockサーバーを構築し、データが取得できることを確認します。
環境準備
一口にクライアント側と言っても、いろいろあると思いますが、今回はスマホアプリをイメージしてDart-Flutterをしようします。
※Flutterの基本的な開発環境があることが前提です。環境構築は今回のブログのテーマから外れるので、割愛します。
もし『まだ環境がない』という方でWindows11をお使いの場合、こちらをどうぞ→https://isub.co.jp/flutter/flutter-dev-vscode-on-windows11/
と、弊社社長のブログを紹介しつつ、『バックエンド開発にはWindows機を使用して、フロント側ではMacを使用する』という現場あるある的なものをイメージして、こちらのブログではMacを使用します。しかも VSCode ではなく、Android Studio を使用します。スミマセン(笑)
基本的な部分は変わりませんので、臨機応変にお好きな環境でどうぞ。です。
ツールとしては、Flutterの開発環境の他に以下のものを使用します。
・openapi-generator
https://openapi-generator.tech/docs/installation/
今回はjarではなくCLIを使用してみます。インストール方法は色々あるのでお好きなものを。自分はhomebrewを使用しました。
・Stoplight Prism
https://stoplight.io/open-source/prism
動作確認用のMockサーバーを簡単に構築するために使用します。こちらもお好きなインストール方法をどうぞ。
プロジェクト作成〜自動生成
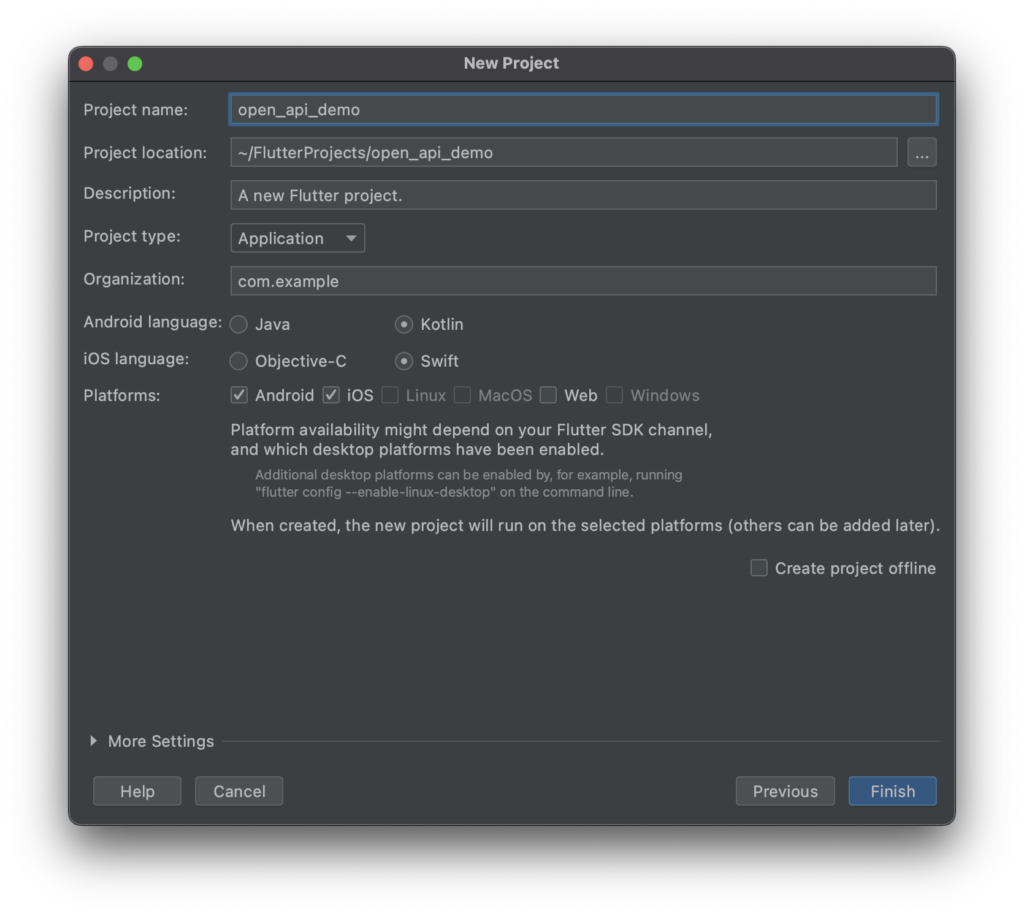
まずはAndroid Studio で Flutter New Project を作ります。特に指定はありませんのでデフォルト構成です。flutter create でもOKです。
作成した新規プロジェクトに、自動生成の元となる定義ファイルを格納します。
OpenAPIの定義はサーバー側と同じものを使います。同じ定義を基ととして作ることができるのがこの開発の最大の強みです。
プロジェクトルートに specs ディレクトリを作成してインターフェース定義を格納します。Prism で使用する時のためにちょっと変更してますが、前回のものと基本的な部分に変化はありません。
specs/openapi_demo.yaml
openapi: 3.0.0
info:
  title: openapi_demo
  version: '1.0'
  description: OpenAPIのデモ
servers:
  - url: 'http://localhost:8080'
paths:
  /users:
    get:
      summary: ユーザー一覧取得
      tags: []
      responses:
        '200':
          description: OK
          content:
            application/json:
              schema:
                $ref: '#/components/schemas/UserList'
              # prism-mockでデータ取得のため編集
              examples:
                example-1:
                  value:
                    users:
                      - id: 0
                        familyName: family Name 0
                        givenName: given 0
                      - id: 1
                        familyName: family Name 1
                        givenName: given 1
                      - id: 2
                        familyName: family Name 2
                        givenName: given 2
      operationId: get-users
      parameters:
        - schema:
            type: integer
            default: 10
          in: query
          name: max
          description: 最大取得数
      description: ユーザー一覧取得します。クエリパラメータに最大取得数を指定できます。
      x-internal: false
    post:
      summary: ユーザー登録
      operationId: post-users
      responses:
        '200':
          description: OK
          content:
            application/json:
              schema:
                $ref: '#/components/schemas/ResultResponse'
              # prism-mockでデータ取得のため編集
              examples:
                正常終了:
                  value:
                    resultCode: 1
                    message: 正常終了
      description: ユーザのリストを新規登録します。登録結果を応答します。
      requestBody:
        content:
          application/json:
            schema:
              $ref: '#/components/schemas/UserList'
        description: 登録するユーザのリスト
    parameters: []
components:
  schemas:
    User:
      title: User
      description: ユーザ
      type: object
      properties:
        id:
          type: integer
        familyName:
          type: string
        givenName:
          type: string
    UserList:
      title: UserList
      description: ユーザリスト
      type: object
      properties:
        users:
          type: array
          items:
            $ref: '#/components/schemas/User'
    ResultResponse:
      title: ResultResponse
      x-stoplight:
        id: rjge5xshdwsv9
      type: object
      x-examples:
        success:
          resultCode: 0
          message: 登録が正常に終了しました
      properties:
        resultCode:
          type: integer
        message:
          type: string
      description: 処理結果コードとメッセージ
資材が整ったところで自動生成です。
プロジェクトルートで以下のコマンドを実行します。
openapi-generator generate -i ./specs/openapi_demo.yaml -g dart -o ./client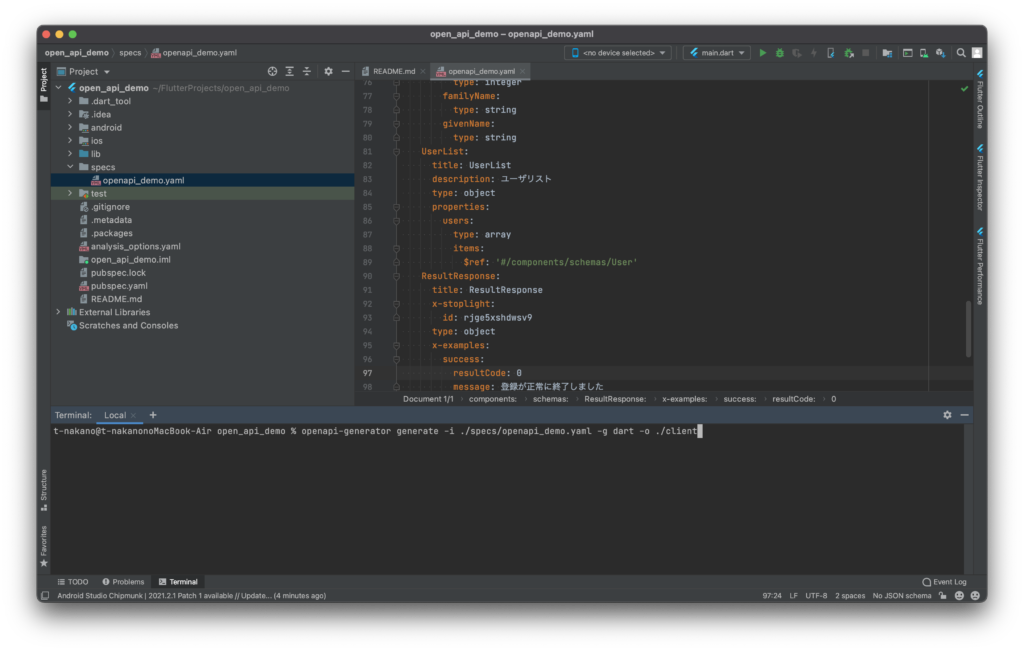
実行後、以下の結果が出れば成功です。
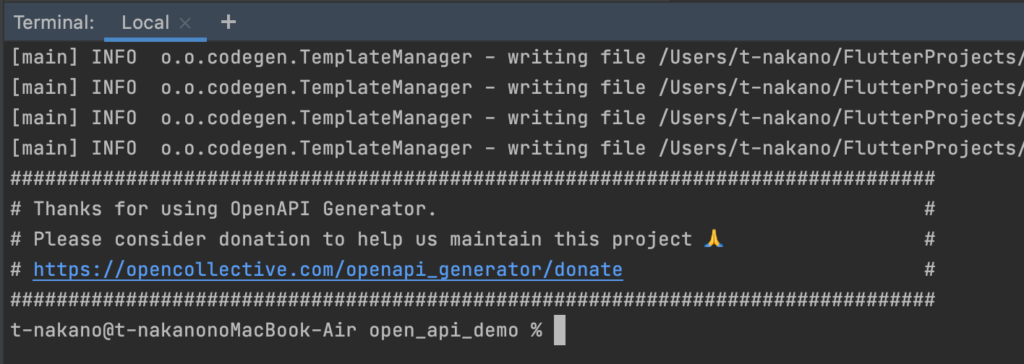
自動生成物は./client配下に作成されますので( -o で指定しているディレクトリ配下)、確認してみましょう。
構成としてはFlutterのパッケージそのものですね。
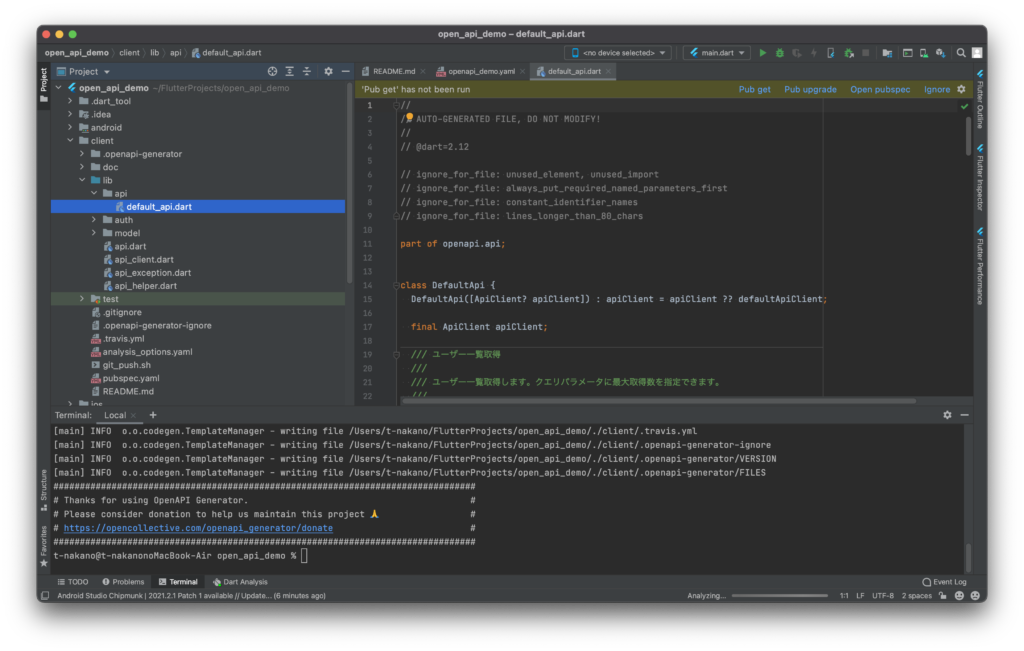
メインは DefaultApi です。定義したAPIはこちらに作成されます。
基本的に HTTPメソッド+定義したAPI名 のメソッドと、WithHttpInfo がついたメソッドがそれぞれ作成されます。
使い分けとしてはResponseのbodyのみで良い場合は前者、ステータスやヘッダー情報が必要な場合は WithHttpInfo のついている後者を使うようです。実装的にも前者を呼び出した場合、内部で WithHttpInfo のついたメソッドを使用して、body のみを返している感じですね。
//
// AUTO-GENERATED FILE, DO NOT MODIFY!
//
// @dart=2.12

// ignore_for_file: unused_element, unused_import
// ignore_for_file: always_put_required_named_parameters_first
// ignore_for_file: constant_identifier_names
// ignore_for_file: lines_longer_than_80_chars

part of openapi.api;


class DefaultApi {
  DefaultApi([ApiClient? apiClient]) : apiClient = apiClient ?? defaultApiClient;

  final ApiClient apiClient;

  /// ユーザー一覧取得
  ///
  /// ユーザー一覧取得します。クエリパラメータに最大取得数を指定できます。
  ///
  /// Note: This method returns the HTTP [Response].
  ///
  /// Parameters:
  ///
  /// * [int] max:
  ///   最大取得数
  Future<Response> getUsersWithHttpInfo({ int? max, }) async {
    // ignore: prefer_const_declarations
    final path = r'/users';

    // ignore: prefer_final_locals
    Object? postBody;

    final queryParams = <QueryParam>[];
    final headerParams = <String, String>{};
    final formParams = <String, String>{};

    if (max != null) {
      queryParams.addAll(_queryParams('', 'max', max));
    }

    const contentTypes = <String>[];


    return apiClient.invokeAPI(
      path,
      'GET',
      queryParams,
      postBody,
      headerParams,
      formParams,
      contentTypes.isEmpty ? null : contentTypes.first,
    );
  }

  /// ユーザー一覧取得
  ///
  /// ユーザー一覧取得します。クエリパラメータに最大取得数を指定できます。
  ///
  /// Parameters:
  ///
  /// * [int] max:
  ///   最大取得数
  Future<UserList?> getUsers({ int? max, }) async {
    final response = await getUsersWithHttpInfo( max: max, );
    if (response.statusCode >= HttpStatus.badRequest) {
      throw ApiException(response.statusCode, await _decodeBodyBytes(response));
    }
    // When a remote server returns no body with a status of 204, we shall not decode it.
    // At the time of writing this, `dart:convert` will throw an "Unexpected end of input"
    // FormatException when trying to decode an empty string.
    if (response.body.isNotEmpty && response.statusCode != HttpStatus.noContent) {
      return await apiClient.deserializeAsync(await _decodeBodyBytes(response), 'UserList',) as UserList;

    }
    return null;
  }

  /// ユーザー登録
  ///
  /// ユーザのリストを新規登録します。登録結果を応答します。
  ///
  /// Note: This method returns the HTTP [Response].
  ///
  /// Parameters:
  ///
  /// * [UserList] userList:
  ///   登録するユーザのリスト
  Future<Response> postUsersWithHttpInfo({ UserList? userList, }) async {
    // ignore: prefer_const_declarations
    final path = r'/users';

    // ignore: prefer_final_locals
    Object? postBody = userList;

    final queryParams = <QueryParam>[];
    final headerParams = <String, String>{};
    final formParams = <String, String>{};

    const contentTypes = <String>['application/json'];


    return apiClient.invokeAPI(
      path,
      'POST',
      queryParams,
      postBody,
      headerParams,
      formParams,
      contentTypes.isEmpty ? null : contentTypes.first,
    );
  }

  /// ユーザー登録
  ///
  /// ユーザのリストを新規登録します。登録結果を応答します。
  ///
  /// Parameters:
  ///
  /// * [UserList] userList:
  ///   登録するユーザのリスト
  Future<ResultResponse?> postUsers({ UserList? userList, }) async {
    final response = await postUsersWithHttpInfo( userList: userList, );
    if (response.statusCode >= HttpStatus.badRequest) {
      throw ApiException(response.statusCode, await _decodeBodyBytes(response));
    }
    // When a remote server returns no body with a status of 204, we shall not decode it.
    // At the time of writing this, `dart:convert` will throw an "Unexpected end of input"
    // FormatException when trying to decode an empty string.
    if (response.body.isNotEmpty && response.statusCode != HttpStatus.noContent) {
      return await apiClient.deserializeAsync(await _decodeBodyBytes(response), 'ResultResponse',) as ResultResponse;

    }
    return null;
  }
}
その他、Modelはまさにモデルクラス、authディレクトリにはAPIで使用するauth関連があります。

説明文にも “AUTO-GENERATED FILE, DO NOT MODIFY!” とありますが、これらのソースは実装者が編集することはないと思います。
ただし、実装ではありませんが pub get して依存パッケージを取り込む必要があります。上のスクリーンショットでも pub get するように指示が出ています。
client配下にpubspec.yamlがありますので、こちらで依存パッケージを取得します。
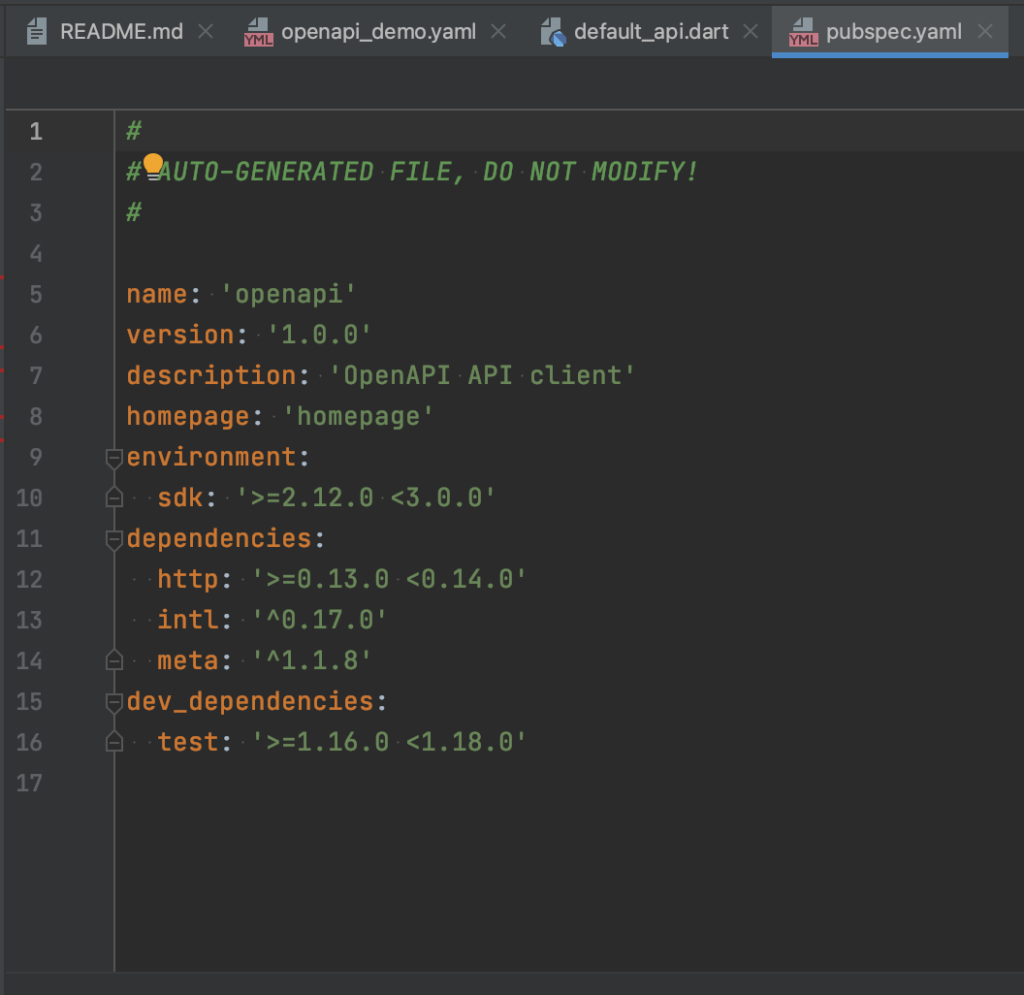
ちなみに、要約で触れていますが、httpパッケージが使用されています。
依存するパッケージは generatorのオプションにより以下になります。
| -g オプション引数 | 依存パッケージ |
| dart | http |
| dart-dio | dio |
| dart-jaguar | jaguar |
ちなみにdioなどは自動生成後に build-runner でそれぞれの .g. ファイルを生成する必要があるはずです。
機能実装
では実装です。
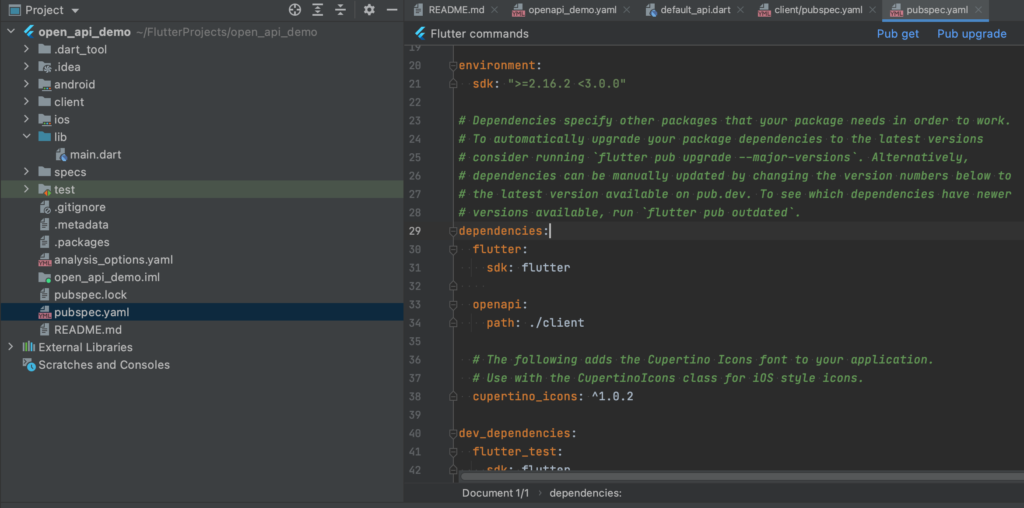
まず、生成したコードをプロジェクトに含める必要があるので、プロジェクトルートの方のpubspec.yamlに以下を記載します。
dependencies:
  openapi:
    path: ./client
先ほど確認した pubspec.yaml でパッケージ名がopenapiと書いてあったので、そちらをのパスを依存先として定義します。もちろん追記したら pub get しておきましょう。
本来はAPIでデータを取得するのならば、Repository層などで行なって、状態変更を通知する感じになると思います。ただ、今回はシンプルに動作することを確認したいので、本当ならばアンチパターンですが、UIのコードの中にロジックを作ります。
lib/main.dart
import 'package:flutter/material.dart';
import 'package:trial_open/user_list_screen.dart';

void main() {
  runApp(const MyApp());
}

class MyApp extends StatelessWidget {
  const MyApp({Key? key}) : super(key: key);

  @override
  Widget build(BuildContext context) {
    return MaterialApp(
      title: 'API DEMO',
      theme: ThemeData(primarySwatch: Colors.lightBlue),
      home: const UserListScreen(),
    );
  }
}
lib/UserListScreen.dart
※ここでbasePathの設定をしていますが、こちらはご自身のローカルIPを使用してください。ターミナルでifconfig や ipconfig 等で確認して記載してください。
import 'package:flutter/material.dart';
import 'package:openapi/api.dart';

class UserListScreen extends StatefulWidget {
  const UserListScreen({Key? key}) : super(key: key);

  @override
  _UserListScreenState createState() => _UserListScreenState();
}

class _UserListScreenState extends State<UserListScreen> {

  // ベースとなるURLを設定
  ApiClient apiClient = ApiClient(basePath: "http://192.168.10.102:8080");

  // 画面表示用のリスト
  List<User> users = [];

  // APIの返却データを表示用のリストに設定
  Future<void> _getUsers() async {
    DefaultApi api = DefaultApi(apiClient);
    UserList userList = (await api.getUsers())!;
    users = userList.users;
  }

  // 再描画のためのメソッド
  Future<void> _refresh() async {
    await _getUsers();
    setState(() {});
  }

  @override
  Widget build(BuildContext context) {
    return Scaffold(
      appBar: AppBar(
        title: const Text("User List"),
        centerTitle: true,
      ),
      body: Center(
        child: (users.isEmpty)
            ? const Text("No Data")
            : ListView.builder(
                itemCount: users.length,
                itemBuilder: (context, index) => ListTile(
                  leading: Text('${users[index].id}'),
                  title: Text(
                      '${users[index].givenName} : ${users[index].familyName}'),
                ),
              ),
      ),
      floatingActionButton: FloatingActionButton(
        child: const Icon(Icons.play_arrow),
        onPressed: _refresh,
      ),
    );
  }
}
外部と通信する必要があるのでパーミッションを追記します。
android/app/src/main/AndroidManifest.xml
<!-- Required to fetch data from the internet. -->
<uses-permission android:name="android.permission.INTERNET" />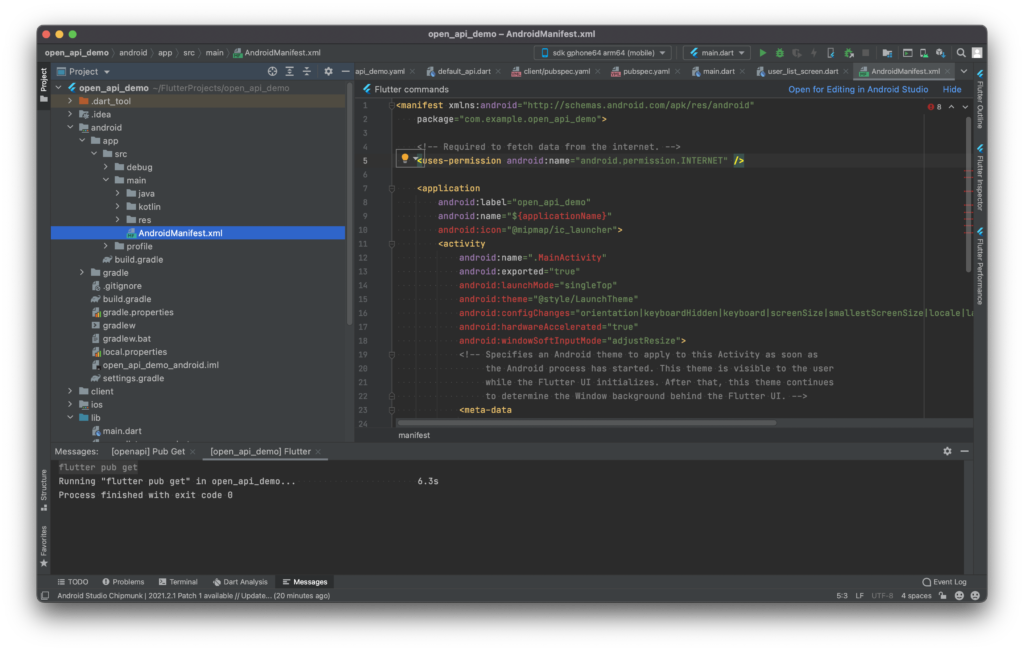
動作確認
実装はできました。実行してみましょう。
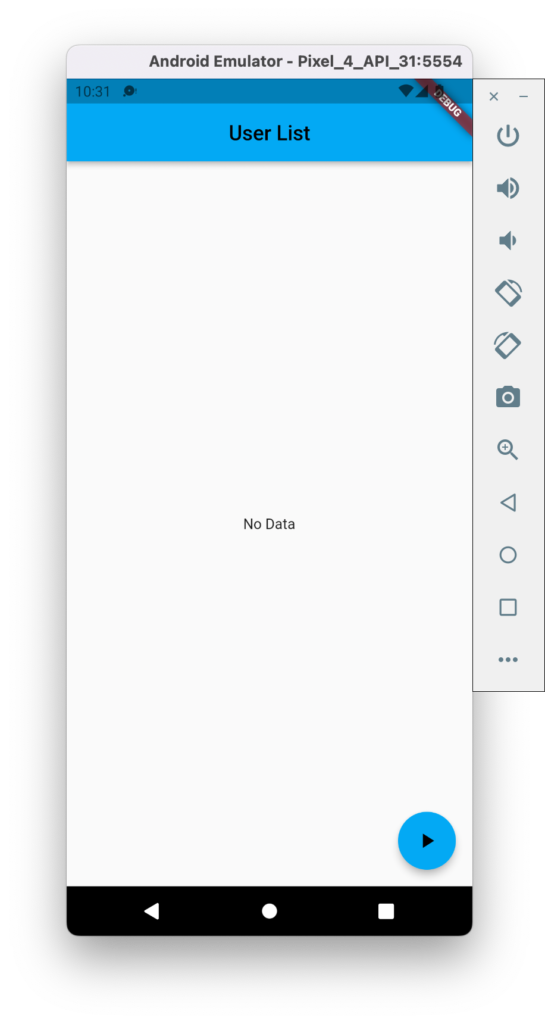
当たり前ですが、APIサーバーを実行してないため、データが取得できません。
これが、「サーバーが出来ていないから、クライアントの実装が完了しない」の状態ですね。
これを解消するために、別途リソースファイルを使用したり、ダミーデータを当てたりすると思いますが、今回はせっかくOpenAPIの定義があるので、それを活用してMockサーバーを立ててみましょう。
使用するのはprismというツールです。
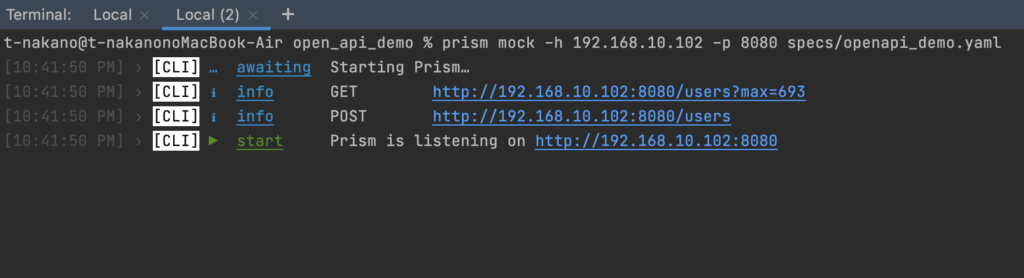
インストールしてあれば、あとは簡単で以下のコマンドを実行するだけです。
※この時もホストIPはご自身のPCのローカルIPを指定してください。
prism mock -h 192.168.10.102 -p 8080 specs/openapi_demo.yaml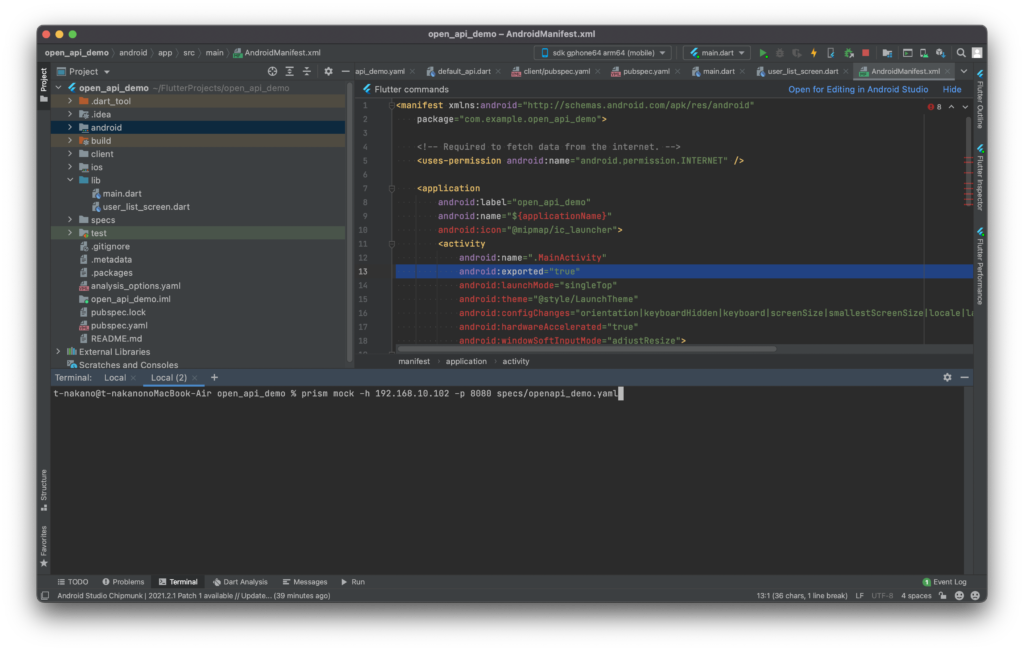
フローティングアクションボタンからAPIを叩いてみます。
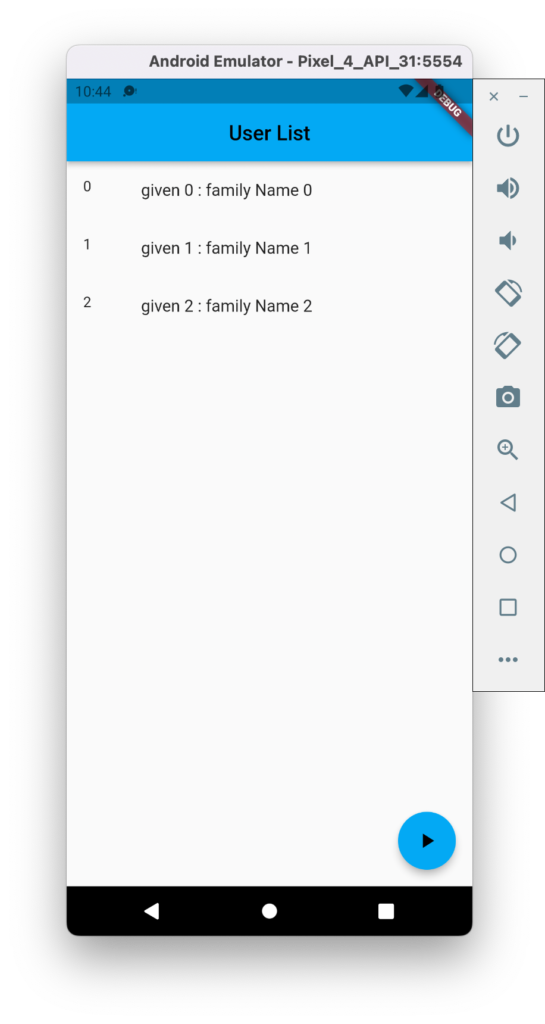
取得できました。
この時取得しているデータというのは、定義yamlの example に記載されている内容です。
何度叩いても同じ内容だと、本当にprismのMockで取得できているのか不安になるので、一度 ctrl + c で実行を止めて、以下の-d オプションを追加したコマンドで prism を再起動してみます。
prism mock -d -h 192.168.10.102 -p 8080 specs/openapi_demo.yaml
今度はランダムな文字列が表示されています。
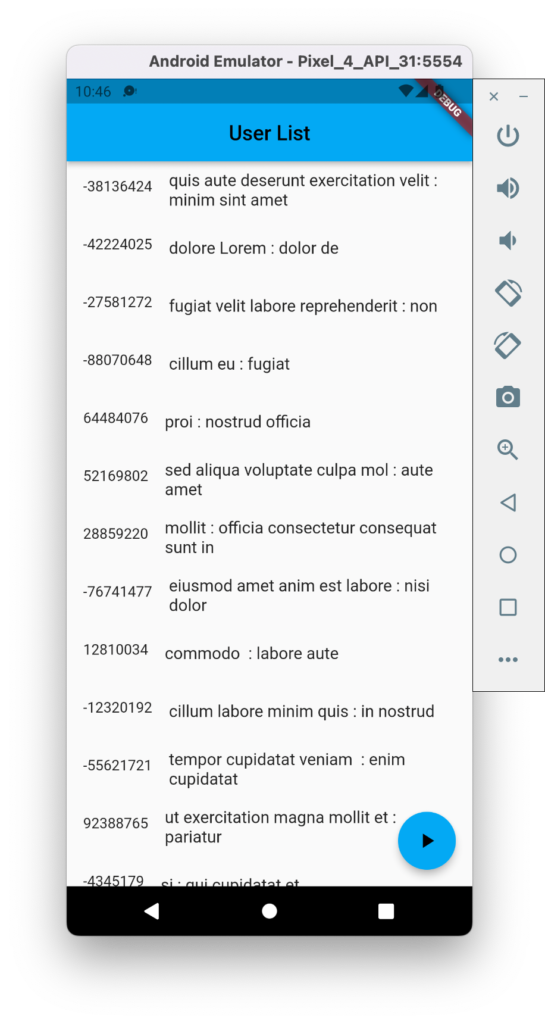
これはprism Mockサーバーがランダムに自動生成してくれるものです。正直使い勝手はあまり良くなく、有用な場面は限定的です。ランダム要素でとりあえず疎通を見たいとか、データ取得の過程でエラーがないことを確認したいといった需要には対応できるかなと思います。
終わりに
これでFlutterのAPI自動生成は終了です。
今回のポイントは、APIの定義さえあれば、相手の実装状態がどうであるかをまったく気にしないで良い事です。前回で作った java-spring のサーバーがなくともクライアントの実装は進むようになります。
『サーバーが実装できていないから画面つくれません』という言い訳も使えませんが、関心の分離は良いことです。
以上です。ありがとうございました。